


Renting Drones
![]()

Visita nuestras redes sociales
![]()
![]()
![]()

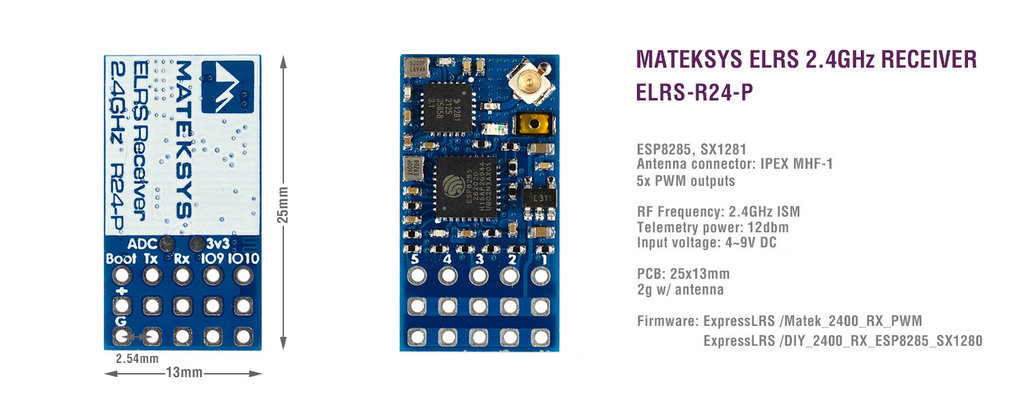
Categoría de Productos Drones Carrera FPV Matek Matek Receptor ExpressLRS R24-P 2.4GHz PWM
Matek Receptor ExpressLRS R24-P 2.4GHz PWM
N.º de producto: R24-P 2.4GHz PWM
En existencias
se puede enviar en 1 días


15,99 €